The full source code for this demo is available on my GitHub repository.
💬 Introduction
In this post, we’ll explore Azure Service Bus - setting it up in Azure, sending data to a queue, and retrieving messages from it.
By the end, you’ll see how Azure Service Bus helps you build scalable, decoupled applications that can handle real‑world workloads reliably.
❓ What is Azure Service Bus?
Azure Service Bus is Microsoft’s version of enterprise cloud messaging.
It enables applications and services to communicate with each other asynchronously via messages.
Messages are stored in queues or topics until an application or service processes them. This ensures reliable delivery even when a service is temporarily unavailable.
⚙️ How does it Work?
In messaging, a producer creates and sends a message to the service bus, and a consumer retrieves the message.
There are two types of entities in Azure Service Bus:
Queues
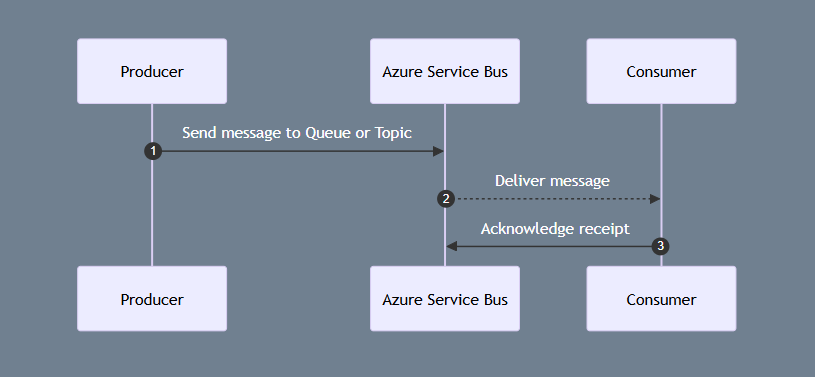
When a producer sends a message to a queue, Azure Service Bus will store it until it is retrieved by a consumer.
This is known as point-to-point messaging.
Here’s a high-level sequence:
- Producer sends a message to a queue.
- Service Bus stores the message.
- Consumer retrieves and processes the message.
Topics
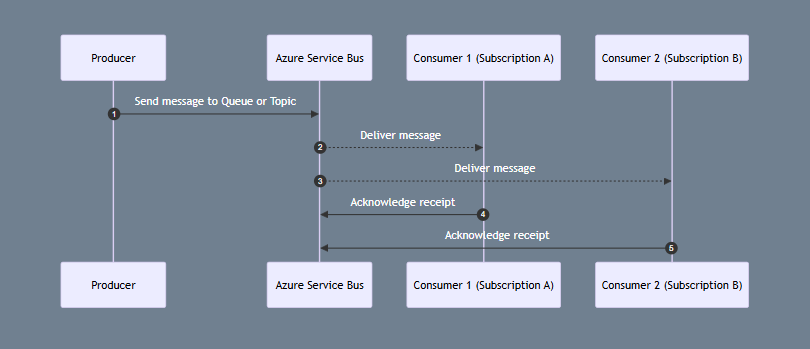
Topics behave differently to queues in that they store the message for multiple consumers via subscriptions.
This is known as publish/subscribe messaging.
When a producer sends a message to a topic, Azure Service Bus will store it until it is retrieved by all subscriptions.
Here’s a high-level sequence:
- Producer sends a message to a topic.
- Service Bus stores the message.
- Consumer from one subscription retrieves and processes the message.
- Consumer from a different subscription retrieves and processes the message.
📽️ Demo
In this demo, I will show you how to set up a queue in Azure Service Bus, send messages to it via a console app, and retrieve messages in a Blazor SSR web app.
Setting Up Azure Service Bus
It is very easy to get started with Azure Service Bus in Azure.
- Firstly, search for ‘service bus’ and select it in the results. You will be taken to the home page for Azure Service Bus.
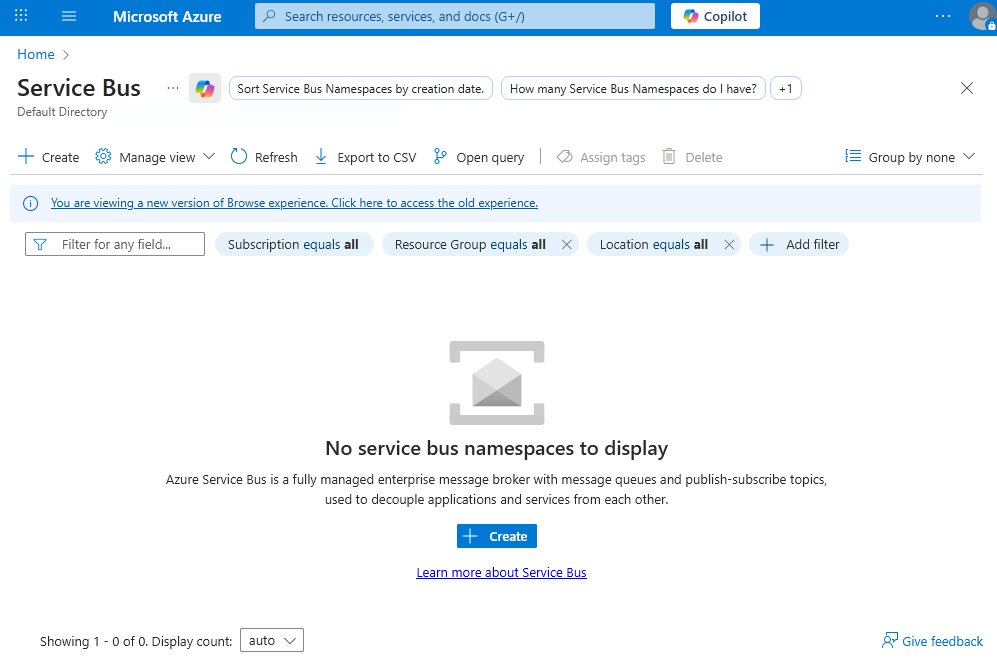
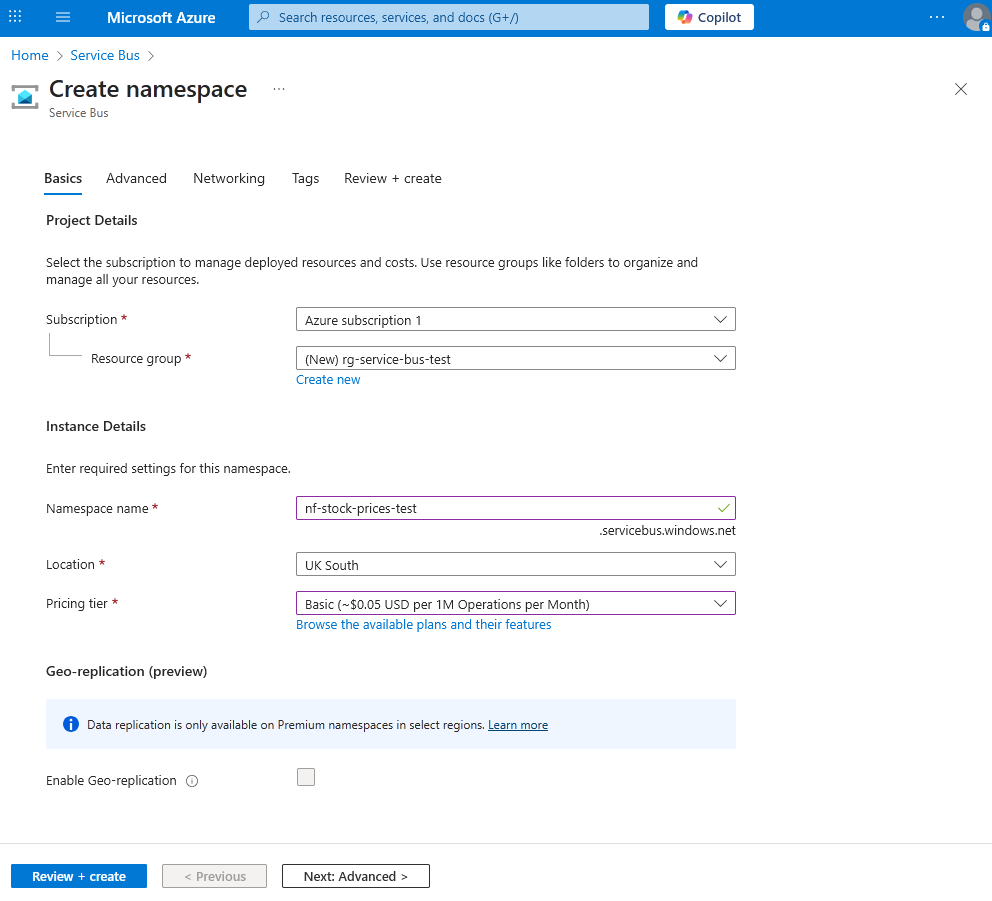
- Click on ‘Create’ to create a new namespace in Azure Service Bus.
You will need to create a new resource group for it or select an existing one.
There are three pricing tiers for Azure Service Bus:
| Feature | Basic | Standard | Premium |
|---|---|---|---|
| Queues | ✅ | ✅ | ✅ |
| Scheduled messages | ✅ | ✅ | ✅ |
| Topics | ❌ | ✅ | ✅ |
| Transactions | ❌ | ✅ | ✅ |
| De-duplication | ❌ | ✅ | ✅ |
| Sessions | ❌ | ✅ | ✅ |
| ForwardTo/SendVia | ❌ | ✅ | ✅ |
| Message Size | 256 KB | 256 KB | 100 MB |
| Resource isolation | ❌ | ❌ | ✅ |
| Geo-Disaster Recovery (Geo-DR) | ❌ | ❌ | ✅* |
| Java Messaging Service (JMS) 2.0 | ❌ | ❌ | ✅ |
| Availability Zones (AZ) support | ✅ | ✅ | ✅ |
*Requires additional Service Bus Premium namespaces in another region.
Fill in the required fields and create the namespace.
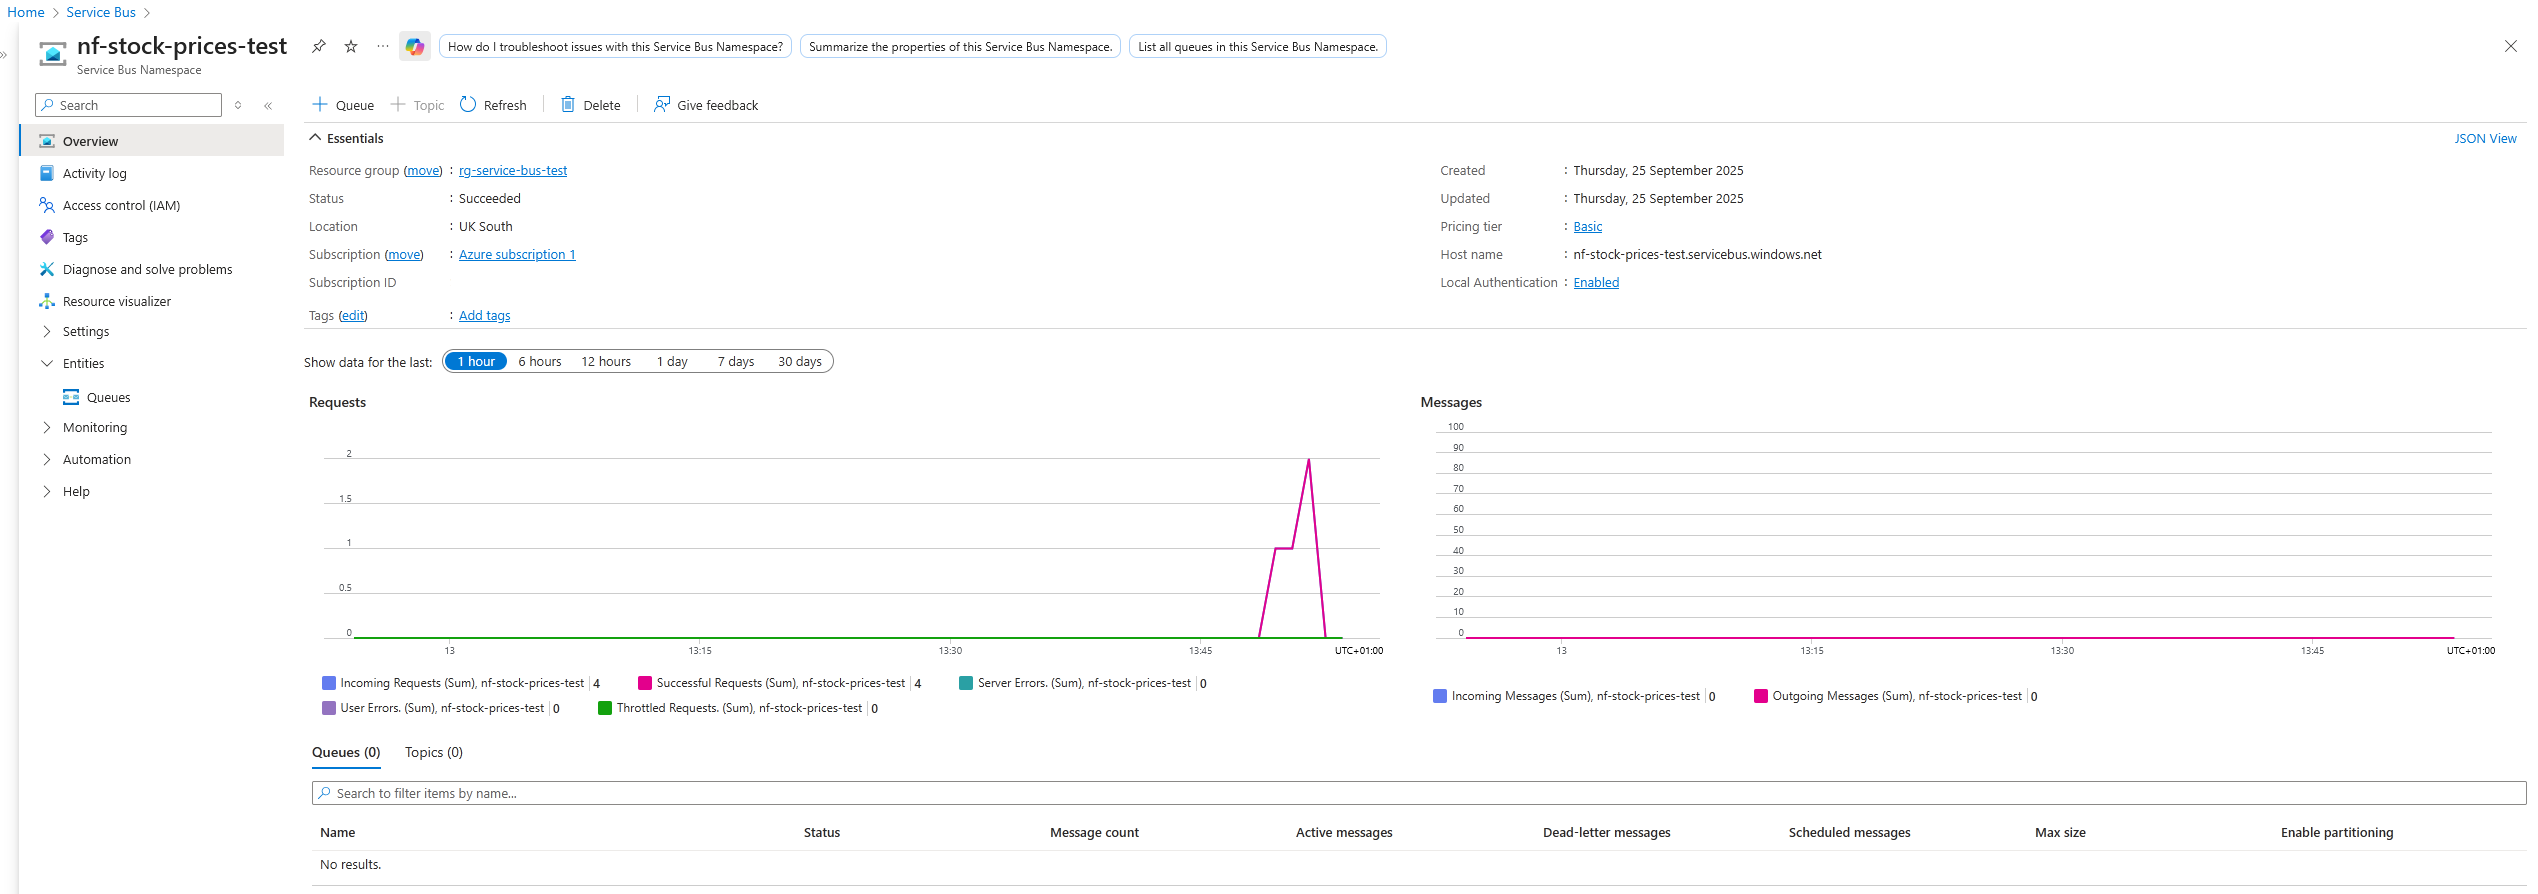
Go to the resource once it has finished creating.
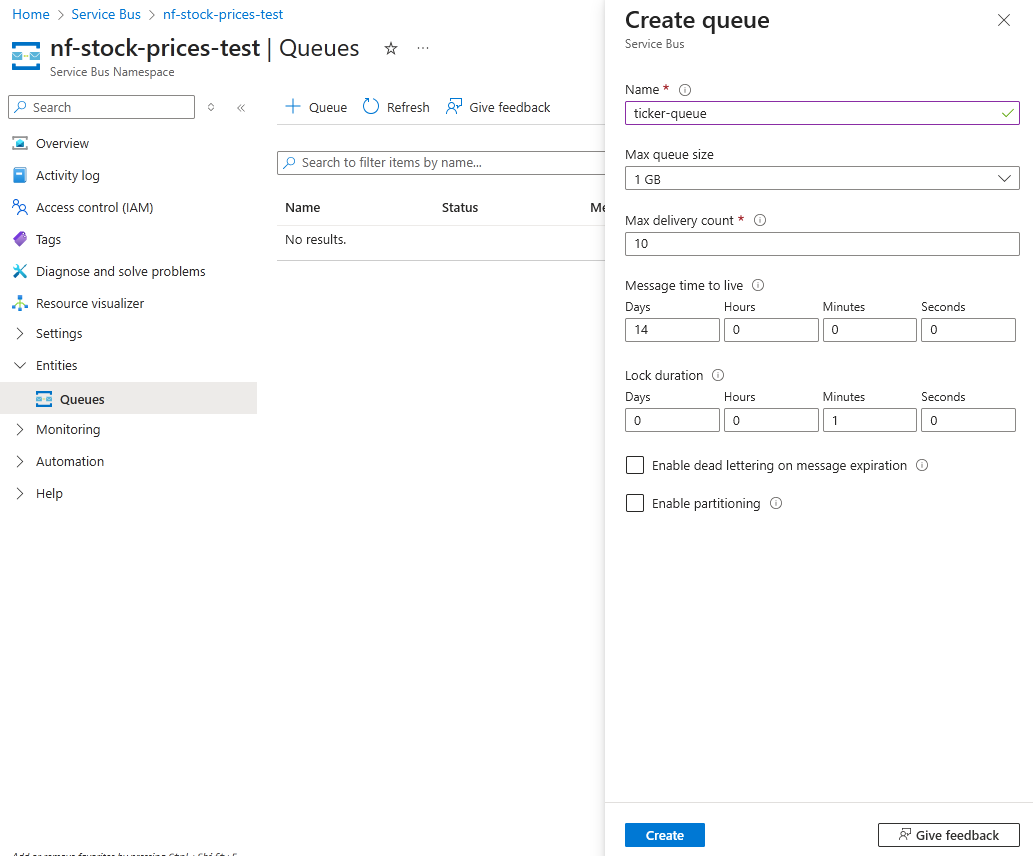
- Add a Queue in the Entities page
In the sidebar, expand Entities and select Queues. Click on the plus button to add a queue.
There are several options for queues:
- Max queue size: Choose between 1-5 GB for the queue, depending on how many messages are produced and how quickly they are processed.
- Max delivery count: The limit of attempts to send a message before it is moved to the dead-letter queue.
- Message time to live: Determines how long a message can sit in a queue before it is expired or moved to the dead-letter queue.
- Lock duration: Determines how long a consumer has to process a message before it unlocks and becomes available to other consumers to process.
- Enable dead lettering on message expiration: When the message’s time to live expires, move to dead-letter queue.
- Enable partitioning: Distributes messages across multiple message brokers for high-volume workloads.
For the purpose of this demo, I have stuck with the default options.
Sending Messages to a Queue
Now that we have a queue, we can create a producer application to send messages to it.
I have created a stock ticker console application that posts the prices for 10 stocks every second.
Access Keys
ℹ️ I would recommend creating a key with appropriate claim(s) for each application that accesses the queue.
First, we need to take a copy of the connection string that we will use to connect to the queue:
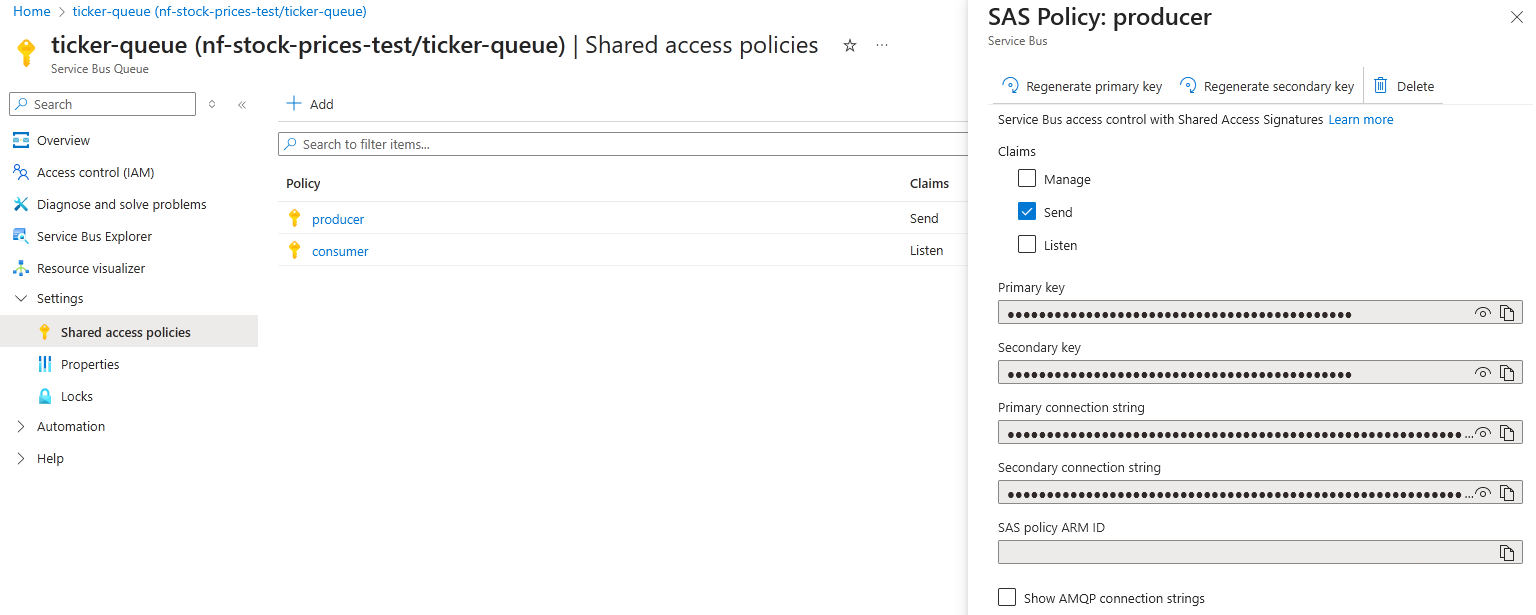
- In the queue’s page, expand Settings and click on Shared access policies.
- Add a key for each application and set the appropriate claims for them.
I have created two keys:
- One for the producer app that will send the messages - this has the Send claim.
- One for the consumer app that will listen and process the messages. This has the Listen claim.
Copy the primary connection string for each key, as these will be required in the applications.
The Producer Application
The application uses the Azure.Messaging.ServiceBus NuGet package. This package provides helpful classes to establish a connection with the queue and send messages to it.
I have added the key for the producer and the queue name to a User Secrets file.
The application creates a client with the key, and then creates a sender for the queue:
| |
Then, it generates random prices for the 10 stock tickers before creating a message containing the prices and sending it to the queue:
| |
It is as simple as that to send messages to a queue from an application.
Retrieving Messages from a Queue
I have also created a Blazor app to demonstrate retrieving these messages.
As a Blazor Server app, it uses SignalR to update the UI in real time, as soon as the messages are received.
Once again, the Azure.Messaging.ServiceBus is required to retrieve the messages.
Program.cs
In Program.cs, the service bus classes are implemented, along with the StockPriceService class, which is used to retrieve the messages:
| |
StockPriceService.cs
StockPriceService inherits IHostedService to run as a background service for the Blazor app. This interface enforces two methods: StartAsync and StopAsync.
Several fields have been added to process messages and enable the UI to update in real time:
| |
_processoris the class that retrieves the messages._clientis the client registered inProgram.cs. It is used to create the_processor.OnChangeis the function that the UI subscribes to, ensuring it’s notified whenever new messages are processed.
StartAsync
StartAsync creates the processor via the client and begins processing the messages:
| |
OnMessageReceivedAsync
OnMessageReceivedAsync deserialises a message, updates the list of stocks with new prices, and invokes the OnChange function, before completing the message:
| |
StopAsync
StopAsync stops processing messages and disposes of the processor:
| |
Home.razor
The home page lists the stock prices.
It subscribes to the OnChange function from StockService and invokes StateHasChanged to refresh the UI whenever new prices are processed:
| |
🎬 And… Action!
Here we can see the producer sending messages to the queue, and the consumer retrieving and displaying the messages in real time:
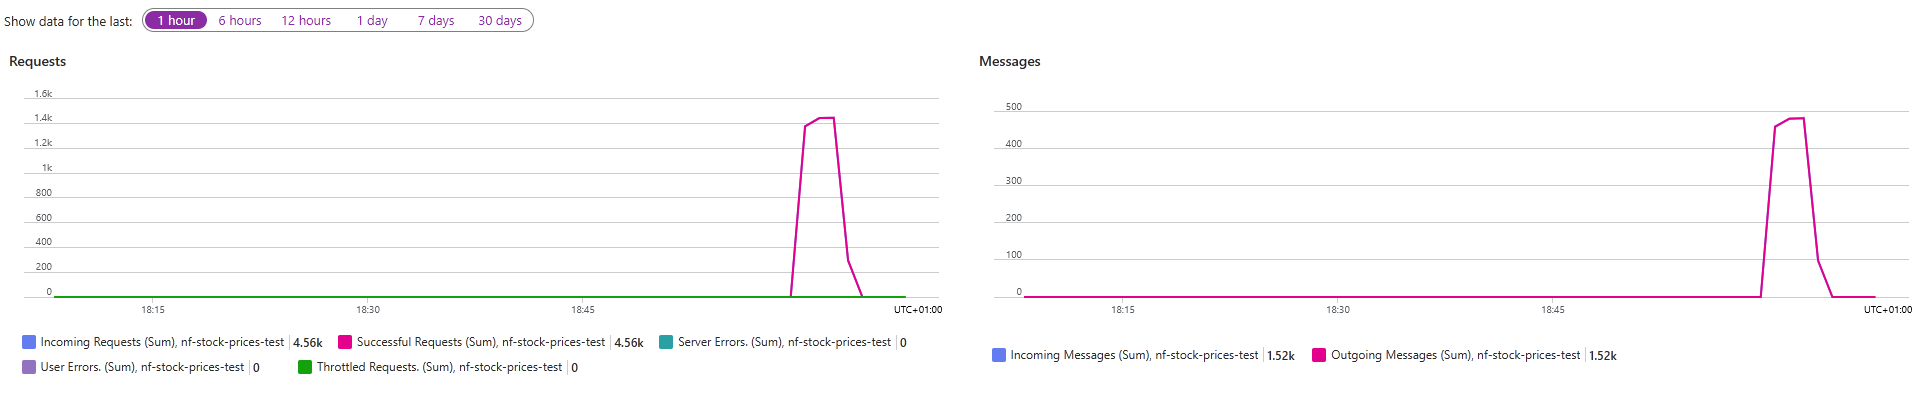
The graphs on the service bus namespace show the usage for each queue. We can see that 1.52k messages have been sent to the queue and 1.52k messages have been processed by the consumer:
📘 Further Reading
For more in-depth information on Azure Service Bus, Microsoft provides detailed documentation:
In case you missed it, the full source code for this demo is available on my GitHub repository.